For folks looking to make their own bread at home (or bread to share with neighbors), I’m sharing my recipe for an easy-to-make, very-little-kneading round rustic bread. It’s super forgiving recipe that makes crowd-pleasing bread without needing a sourdough starter or a KitchenAid mixer.
Mine’s a variation on Eric at Breadtopia’s Almost No Knead recipe , which is based on Cook Illustrated’s recipe, which was inspired by NYT’s Mark Bittman’s influential 4-hour bread (read the first comment or watch the video for the real recipe).
Mine’s a bit different in that I use miso to make it sourdough-ish. That works because miso is fermented, giving you echos of sourdough’s fermentation without the work.
If you are absolutely new to bread making, start with the Bittman recipe. Note, unfortunately, that the NYTimes has still not updated the recipe on that page and you have to look at the first comment or watch the video to get the right one.
My version is a bread that rises overnight, then has a very easy knead, then bakes in a dutch oven.
You will need:
- ¼ tsp of instant yeast (¼ tsp) Active Dry will work jut add 1/8 a tsp more
- A dutch oven of some sort – I use this Lodge 3 Qt Cast Iron Combo (that can take heat to 450)
- 15 oz All-purpose, white or bread flour
- 1 tbs Vinegar of any kind (I use white vinegar as default)
- 3 to 4 oz Beer (any kind)
- 6 to 7 oz. Water (tap is fine)
- 1 to 1.5 tsp of salt (table, sea or kosher all work)
- 1 or 2 Tbs of Miso (optional but so good – I prefer brown or red, but any kind will do)
- Some oil, preferably of the sprayable type
- A mixing bowl, preferably two
- A plastic bag big enough to go over the mixing bowl
Nice to have:
- Parchment paper
- Digital scale (very helpful)
- Bread whisk
- Big silicone mat
- Bread scraper or equivalent tool
- Bread scoring tool or a straight razor
- Oven gloves
So first thing to do is measure out 15 ounces of flour (about 3 cups, but far better to weigh it) into a large bowl. Then add 1 ½ teaspoons of salt (1 tsp if using Miso). Give a quick stir. Then add ¼ tsp of active yeast.
Now do the wet ingredients:
If using Miso:, put a 1 or more Tbs of Miso into 6 ozs of water. I do this in a 12 oz Ball jar, since it has markings on it. Microwave this for 1 minute or so. This gets it hot and lets you whisk the miso until it dissolves. You can use whatever implement works best to break up the miso, but be careful if using an immersion blender – this water is warm.
Then add 4 oz of beer, preferably cold. You want the liquid to be lukewarm to warm when adding to the flour so not to kill the yeast.. Now stir in one Tbs of vinegar to the liquid.
Now pour the liquid into the flour. I tend to mix in about 80% of the liquid in the first pour. If you have a bread hook use that to mix up the water and flour. If not, just use your hands or some other tool. Then add the rest of the liquid and get all the flour incorporated. If need be add another oz or two of beer or water. You’ll have a shaggy mixture, which is fine. No need to shape into a ball, the yeast will do that for you.
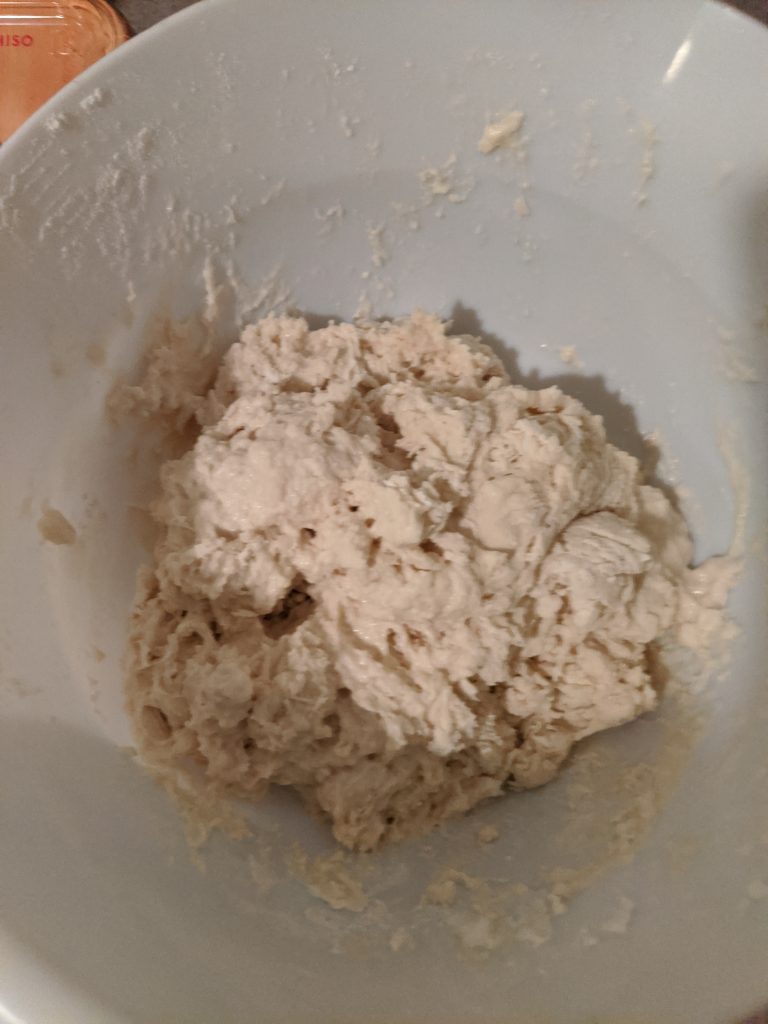
Now put the bowl into a plastic bag and set it aside somewhere moderate temperature for ~ 12 hours. This is very loose. I’ve done 8 hours and 16 hours and it works out fine.
I tend to make this later in the evening then bake in the a.m.
The next morning, take the bread bowl out of the bag. It should have risen about 1.5 to 2x times its original size and have yeasty aeration holes on top.
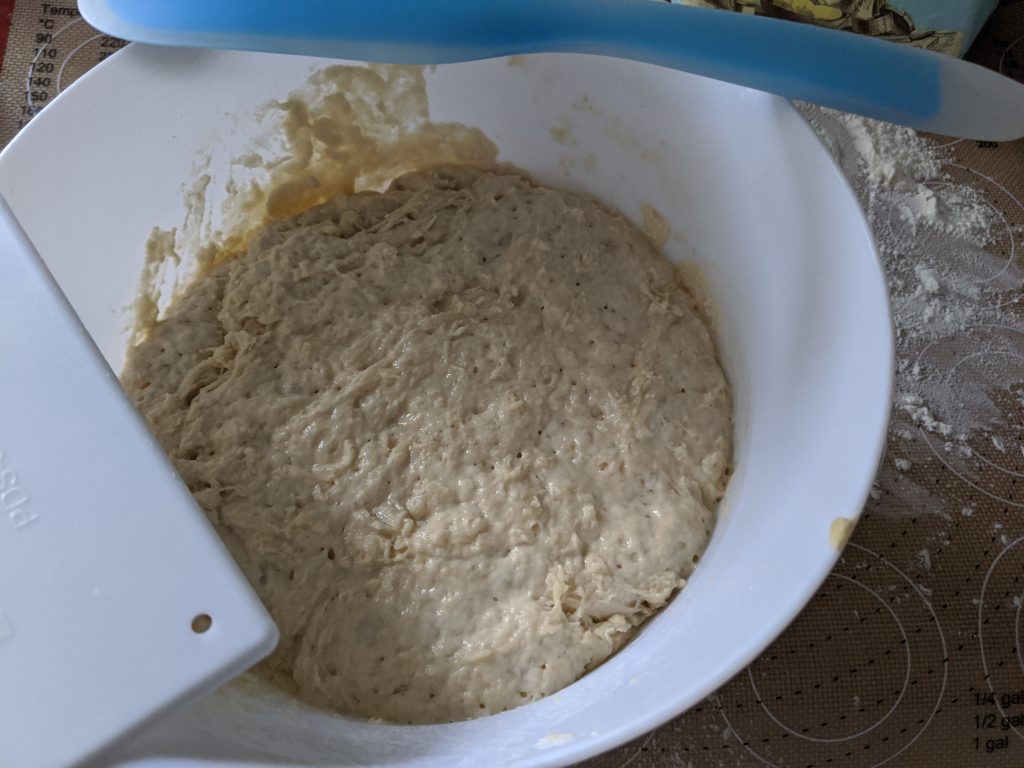
Now, do the second rise and bake. This is easy to do but requires a couple of hours. You’ll knead the dough, let it rest for 2 hours and preheat the oven.
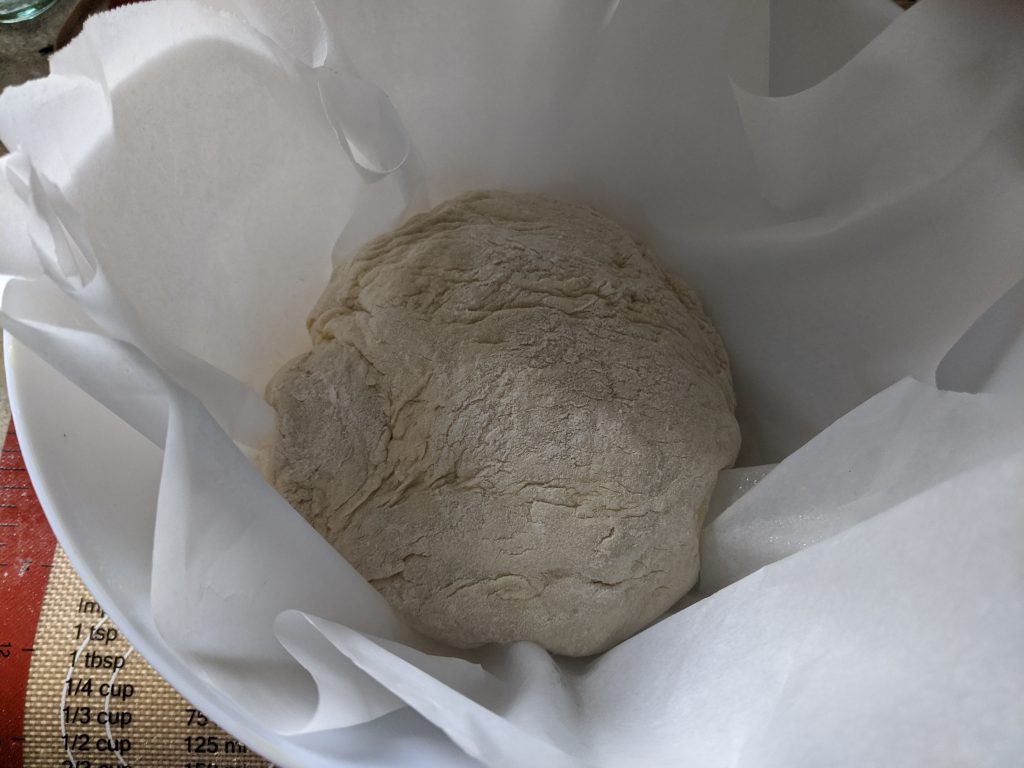
First, if you can, get another bowl and line it with parchment paper. Spray a little oil on it. This is where the dough goes next. You can use the same bowl but it adds a small bit of mess unless you clean the bowl between uses.
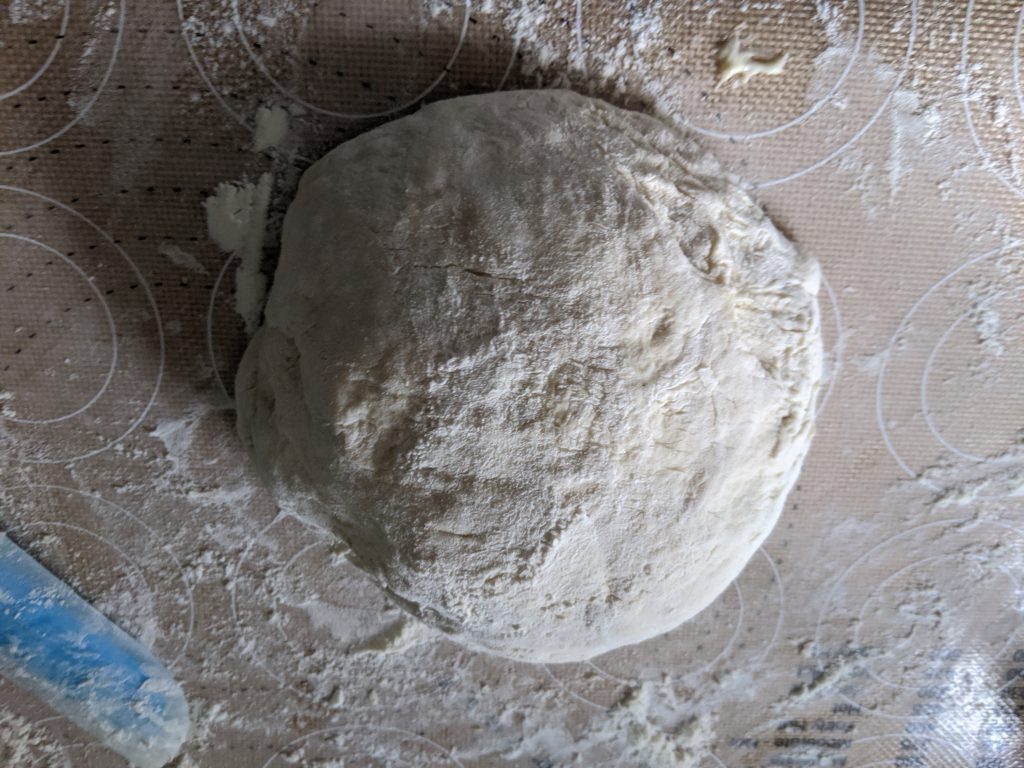
Flour a surface (I prefer a large silicon mat) and get the dough out of the bowl. A bread scraper helps get the dough out, but you can also use a spatula or this great, cheap silicon tool. Sprinkle a little flour on the top so the dough isn’t sticky to the touch.
Now you knead the bread 8 to 15 times, dusting with flour if you run into wet dough. This is pretty light kneading and you can even do it without your hands using the bread scraper or silicon tool.
Form this into a ball and if there’s a seam put it on the bottom. Now put this on the parchment paper in the bowl and put it back in the bag.
You will bake this in 2 hours.
Set a timer for 90 minutes:
This is when you preheat the oven with the Dutch oven in it.
Preheat the oven at 475 or 500 degrees (experiment later).
Let it preheat for 30 minutes.
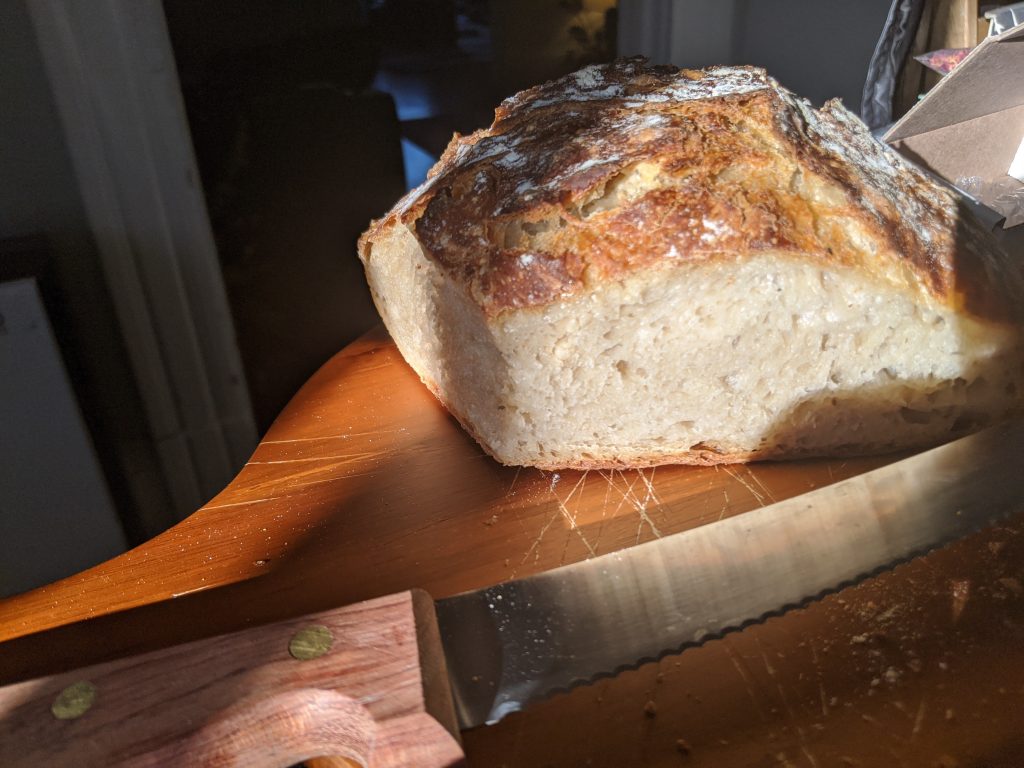
Take a knife and score your bread. 4 short lines with a serrated knife is good (I now use a straight-edge razor). This lets the bread expand when baking. It’s not a big deal if you forget and you can do whatever pattern you like. If you want the bread to look fancy, sprinkle a little flour over the top.
Carefully take out the big part of the dutch oven. If you don’t have parchment paper, sprinkle some corn meal on the bottom to prevent sticking. Now put the top on, put in the middle of the oven and reduce the temperature to 450 or 425.
With my oven, I like to put a baking sheet on the rack below the rack the bread is on. This prevents over-browning. This might not be necessary in your oven.
Bake for 30 minutes covered. This uses steam to get a crust on the bread.
Then open the oven, take the lid off the dutch oven. You can leave it in the oven or put it on the stove. Careful this is VERY hot.
Bake another 15 to 18 minutes.
Take the dutch oven out, using oven mitts or gloves. Use the mitts to take out the bread (via the parchment paper) and put it on a cooling rack or oven burner for 30 minutes (if you can wait that long).
Tada you have bread.
This bread is very forgiving and very versatile. You can throw in hard and/or soft cheeses (add more than you think), add garlic, nuts or spices, substitute whey for the water/beer, experiment with different kinds of beer, vinegar, etc. I’ve experimented with adding extras when first mixing the dough and when kneading and haven’t found a big difference other than better distribution when added in the first stage.
You can also use this same basic slow rise technique to make a decent sandwich loaf using a different pan. See the variation as the second recipe here.
Notes on ingredients/equipment:
Buy a 16 oz bag of active yeast: put it in a Mason or Bell Jar in the freezer. It will stay good for *years*. This is what I use and love: Saf Instant Red
King Arthur Bread flour is my favorite, but any flour will do. If you want to use whole wheat, use it as only part of the flour, add more liquid and expect a much denser bread.
I quite like using a cast-iron dutch oven and now have two so I can bake two loaves at once. The 3-quart size is just perfect for this. They do get heavy and you may need to move them with two hands so I *strongly* recommend oven mitts for both hands. These are what I use (a fine Christmas gift from my partner).
I find it easier to make 2 loaves at a time (even when I had only one dutch oven) as the bread freezes nicely (put it inside 2 sealed plastic bags). It’s not too much more work to make 2 or more at once than it is to make one loaf.
